- Reduced brittle failures: Increased elongation by more than 100%.
- Improved strength and stiffness: Increased flexural strength and flexural modulus by roughly 15%.
- Better performance at elevated temperatures: Increased heat deflection temperature by roughly 25%.
- Professional-looking parts: New grey color.
Formlabs is making their Tough resin even tougher – with a reformation – offering Tough 2000 as the more advanced 3D printing material.
Formlabs and EAC will continue to sell the Tough resin until it is sold out – then it will be replaced with Tough 2000. If you’ve been using Tough resin – it will be available through the end of 2020.
You can use the Tough 2000 resin on Formlabs desktop stereolithography (SLA) 3D printers – specifically on the Form 3+.
Tough 2000 vs Tough
Compared to Tough Resin, this material reformulation brings:
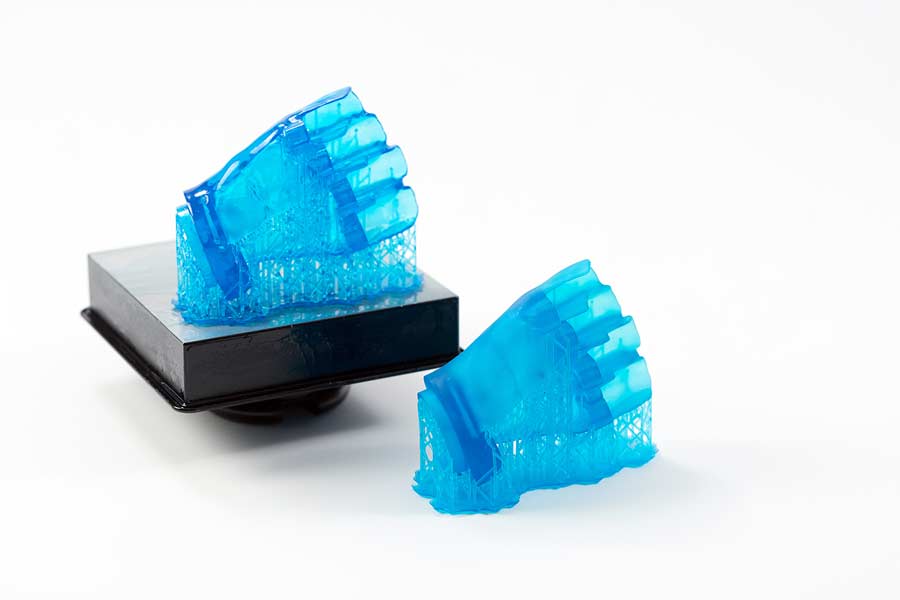
Tough 2000 Resin is the strongest and stiffest material in the functional family of Tough and Durable Resins, with “2000” representing the material’s tensile modulus. The resin is improved elongation, strength, and stiffness, which are typically competing mechanical properties.
Due to its high strength and modulus, Tough 2000 Resin can handle higher stress and will hold its shape better under load compared to Tough 1500 or Durable Resins. When pushed to its stress limit, Tough 2000 parts will bend significantly before ultimately breaking.
Note that Tough 2000 Resin requires specialty resin tanks, Form 2 LT Tank or Form 3 Tank v2.
Other Tough and Durable Resins
This video clip shows a stress test between the Tough 2000, Tough 1500, and Durable Formlabs resins.
Tough 1500 Resin is the most resilient material and is ideal for: prototypes that repeatedly bend and quickly return to shape; jigs and fixtures requiring repeated deflection; and simulating the strength and stiffness of polypropylene (PP).
Durable Resin is the most pliable, impact resistant, and lubricious material and is ideal for: squeezable prototypes and low friction assemblies; non-degrading surfaces as a result of repeated wear; jigs and fixtures that will experience significant impacts; and simulating the strength and stiffness of HD/LD polyethylene (PE).
When should I use Tough 2000 resin?
Tough 2000 Resin offers more advanced mechanical properties and a new dark grey look. It is ideal for:
- Strong and stiff prototypes
- Jigs and fixtures requiring minimal deflection
- Simulating the strength and stiffness of ABS
Choose Tough 2000 Resin for prototyping strong and sturdy parts that should not bend easily, such as housings and enclosures, jigs and fixtures, mechanical connectors, and prototypes undergoing wear and tear.
You can use this resin with applications across engineering, product design, and manufacturing. Tough 2000 resin can be printed for prototypes undergoing wear and tear, mechanical connectors, and housing and enclosures such as the below motor mount.
The improved strength, stiffness, and elongation allow engineers and product designers to iterate with higher confidence and reduce brittle failures.
This video clip shows a motor threading with the Tough 2000 resin.
Where to find Tough 2000 Resin
You can find Tough 2000 resin in our Formlabs Resin Library where you can either order a sample part or order the actual resin.
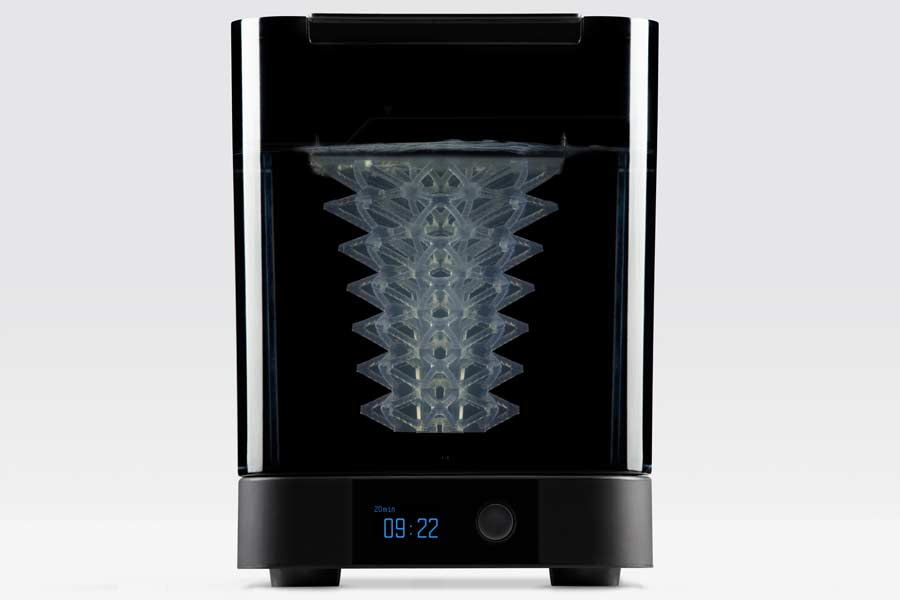
The Form Wash is designed for the Form 2 3D printer from Formlabs to automate the cleaning process between printing parts. It makes things much easier for engineers who don’t want to waste any time cleaning their prototypes so they can either use the Form 2 again for another print job or get back to their next project.
Washing printed parts before post-curing helps to remove excess residual resin from part surfaces and cavities. Formlabs suggests using isopropyl alcohol (IPA) as the solvent that is most compatible with washing.
If you take a look at the image above, you can see that the left part is much cleaner and visually is more detailed than its counterpart. After using the Form Wash, you can typically use the Form Cure to expose printed parts to light and heat to stabilize the parts for performance. Using the Form Cure is not necessary but using the Form Wash and Form Cure together is recommended for optimal finishing.
Colder Products Company (CPC) has trusted EAC for years to provide them multiple Form 2 printers and other Formlabs equipment and materials to rapidly prototype customized quick disconnect couplings, fittings, and connectors for plastic tubing used around the globe. We answer a few questions that users have about the Form 2 and also include an engineer’s intake as well. Here is how Jeff Martin, an applications engineer at CPC, uses the Form Wash in-house to reduce time spent cleaning 3D printed parts.
How much time does it take for one wash?
Formlabs says that most resins require washing for the Form Wash default programmed time, which is 10 minutes – although additional time is needed for some resins. The following table shows Formlabs’ recommended wash times for each resin being used.
| Resin | Wash Time | Resin | Wash Time |
| Tough | 20 min | Elastic | 10 min + 10 min |
| Rigid | 15 min | Dental SG | 5 min |
| Grey Pro | 15 min | Dental LT Clear | 5 min |
| Castable | 10 min | Denture Teeth & Base | 10 min |
| Castable Wax | 10 min | Ceramic | 5 min |
| High Temp | 6 min | All other resins | 10 min |
Jeff suggests that you should set your wash time at 20 minutes for each wash. He also recommends that it’s best to physically have 2 Form Washes in-house to speed up the cleaning process, “The first Form Wash set to 10 minutes to wash parts hanging from the build platform, and the second Form Wash is used to clean the parts broken free from supports.” (Keep in mind, he typically uses Rigid Resin for his 3D prints).
What’s the best way to wash prototypes?
If you’re using the Finishing Kit, Formlabs recommends that you should wash your prototypes in at least two standard wash tanks – the first wash, being the ‘dirty’ wash, would take 10 minutes and then the second wash, using a cleaner tank, for another 10 minutes. Once the first tank gets dirty, you can dispose the IPA, transfer the second tank into the first tank, and then pour new alcohol into the second tank.
The Finishing Kit includes 2 wash tubs to manually clean your 3D prints – whereas the Form Wash automatically cleans your parts and prototypes.
Jeff says the advantage of having a second Form Wash is that you can use Formlabs’ same theory of having a clean tank to do the final rinse. “I find it in my experience to be extremely useful to remove the supports for the second wash. The reason is that the supports block the fresh circulation of clean solvent from the parts. You will notice that for deep aspect bores and blind holes, if you do not remove the supports, they often times will not fully be cleaned of resin. After removing the supports and letting the parts bounce around in the basket during the last 10 minutes, they will always come out clean.”
If you’re interested in a free sample, then contact us at your earliest convenience.
Also, follow me on LinkedIn for tips and tricks on how to use the Form 2 and other equipment and materials from Formlabs!
Industrial Design has always been an important element of successful product development. Aesthetically and functionally pleasing products are important to customer perception and ultimately may add to increased acceptance and improved sales.
The Engineering Services Group at EAC Product Solutions solved such an industrial design challenge for a valued customer, Bob Barker Company, Inc. Bob Barker is America’s leading detention supplier and maker of the Vancell, which is a prisoner transport unit that is installed in commercial vans. They approached EAC to create a successor, which ultimately became the Vancell Elite.

Bob Barker wanted the new version of the Vancell to fit newer, redesigned van models. At the same time, they requested upgrades to several user features. They wanted to incorporate design elements to differentiate the redesign of the Vancell from its competitors. The redesign was required to invoke feelings of ruggedness, strength, and security.

With those challenging requirements, the Designers in the Engineering Services Group started by selecting diamond plate panels for the exterior of the access doors to elude to the element of ruggedness. The diamond shaped patterns were then carried through to the ventilation cutouts in wall panels for continuity of theme. A new logo, designed by Bob Barker Company, was added to the access doors as well as laser cut sheet metal brackets. The bracket was painted black with another bracket behind painted orange for a bold, three-dimensional look. A small Bob Barker decal was placed nearby to increase brand awareness. The Designers also added chrome paddle latches and bright screw heads to accent the diamond patterns and create a sense of security.

Next, a new base color was needed for the exterior of the unit. The competitor’s prisoner transport unit was painted a sterile white that easily showed dirt and wear. The old Vancell was painted a dull gray. Bob Barker Company wanted to set themselves apart from both of these units with a bold and dynamic color. Using CAD models created in PTC Creo, the Designers rendered images in different colors to help the company determine which color was best. A medium matte blue was selected.
Upon agreement of design features and colors, manufacturing drawings were released to a third-party fabrication shop. The prototype of the first transport unit was completed in time for display and demonstration at a large trade show. The Marketing and Sales team at Bob Barker Company were excited about the appearance and function of the completed Vancell Elite and confirmed that it met their requirements — rugged, strong, and secure. They also received many positive comments from prospective customers at the trade show.

The VanCell Elite difference is not only through its new and improved design, but it’s features as well. The VanCell Elite provides improved visibility for greater officer security through controlled viewing, PREA compliant segregation compartments, and an enhanced 4 Camera Viewing System and optional DVR upgrade.
Learn more about the VanCell Elite here.
If you have industrial design or engineering project, the Engineering Services Group can step in and mentor you throughout your design process or act as your engineering team. The innovative engineers and designs can help realize your ideas and transform the way you design your products. For more information, contact us here or learn more about our Design and Engineering services here.
3D printing has been considered a tool to quickly design and create prototypes. It is redefining the way we design products and here’s why:
Faster Design
3D printing allows designers to go directly from design to manufacturing. When you 3D print in-house instead of outsourcing your projects to a third party you can reduce print cycles up to 75%.
Innovation on the Fly
Companies are able to test their prototypes before committing to a specific design. 3D printing welcomes the age of rapid prototyping. Through rapid prototyping, designers are able to evaluate print failures more efficiently and improve their design.
Use Resources Efficiently
3D printing can produce the same technology as other types of heavy machinery at a fraction of the cost.3D printing in-house rather than outsourcing to a third party allows significant cost savings. According to a case study evaluated by one of our customers, they saved 93% by printing in-house. 3D printing in house allows your design to make design improvements quickly and cost efficiently.
To learn more about 3D printing in house and when to outsource, you may be interested in the white paper, ‘When to 3D Print In House and When to Outsource.’ The white paper reviews three 3D printing methods and presents a pros and cons list comparing the methods.
